System building basics
Building computers
New Employees should build a computer on their first day or close to the first day. Checklist for Building Machines
LIN:Top of section
LIN:Top of page
Labels
Good labels are essential to the reliable maintenance of IT systems. While every system of label nomenclature is different, they all have similar elements. Typically some form of location based labeling is used. The location can be building/floor/room/aisle/rack or something similar. A second form of labeling, logical or functional grouping, includes task or process labeling. This is common with smaller installations. Once the naming is determined, the labeling process is the same.
Parts to be labeled
Everything gets labeled. No exceptions. When labeling cables the label will not be applied like a flag. It is printed across the long dimension of the label and then wrapped around the cable like a sheath. Labels should be about 2-3 inches away from the end of the cable terminator device (RJ45 plug, power plug, etc).
cabinets
- At the top on the front and back
switches
- On the front and back. The front is hard when there is little room. Split the label if needed.
patch panels
- Labels on front and back should be visible with the cables in place.
power systems
- Labels on front and also on back if any cables emerge or enter from the back. Each breaker should be labeled with either sections or racks it controls.
servers
- Front and back for system name. All connection ports must also be labeled especially if the manufacturers labeling is unreadable in the rack due to poor lighting. Label network ports to match the OS naming whenever possible.
network cables
- Both ends of network cables must be labeled with the socket locations for that cable. So reading one end of a dangling cable will tell you where both ends should be. Data should be exact port on the machine and exact port on the switch.
fiber lines
- Fiber lines are often hard to label well as they are small. But they must be labeled just all other line labeling. Each end must have data about where both ends connect.
power cables
- Both ends get labeled with machine power port number and power strip name and socket number.
KVM sets
- For sets that are molded sets and split near the connectors, a label near each split point is sufficient. Data should include machine and KVM port. If the mouse and keyboard plugs are not color-coded then each line should be labeled as either mouse or keyboard. Use the flag style for this as the cables are too small otherwise. In all cases the monitor cable should be labeled just like the split point labels.
cooling equipment
- Most cooling equipment is labeled for which section of the data center they cool and for power connections. A label for filter types that is easy to read without pulling a filter out is also common.
power strips, managed or unmanaged
- Power strips are labeled near the end where the strip cord leaves the housing on the face most visible when mounted. The plug end of the cord is also labeled. Managed strips will have prelabeled sockets. Unmanaged strips will usually not. Label data must include where both ends of the power strip are connected. One end is the power conditioner circuit the other is the rack it is mounted in. For dual supply systems, designators like "A" and "B" with corresponding indicators on system power modules is better than "left" and "right". But consistency is key. If power module "A" is on the right of the system viewed from the back, then the power strip on the right should be also "A".
Brady Labeler
There is a Brady Labeler model TLS2200 that is used to print proper labels. The user manual has details on printing labels. The how to enter text section begins on page 18.
Quick label howto
- Turn on labeler with switch on the bottom. For long print runs use the power cable.
- Top line of display has status.
- <01><07><WT><01> is line 1, font size 7, wire type text label, first character
- <02><09><CT><03> is line 2, font size 9, component type text, 3rd character
- Press shift and up arrow to change font size.
- 09 is good. It allows 16 characters per line.
- 08 allows 18
- 07 allows 22
- Set label type to wire vs. component with shift "Wire" (0). It's a toggle.
- Enter the text you need to print and press print.
- Cut label off with black knob on left.
- Peel label off backing and apply printed area first and overwrap with the clear part as protection.
Network cable wiring
Proper, well-made network cabling is essential for the reliable functioning of all the computers at GTRI. While not hard to make, it takes a little bit of time and patience to make a proper Ethernet cable. The extra time required to make a quality cable now will save hours of frustration later trying to diagnose intermittent network problems due to bad cabling.
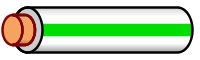
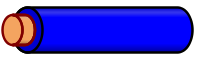
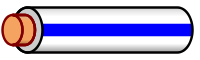
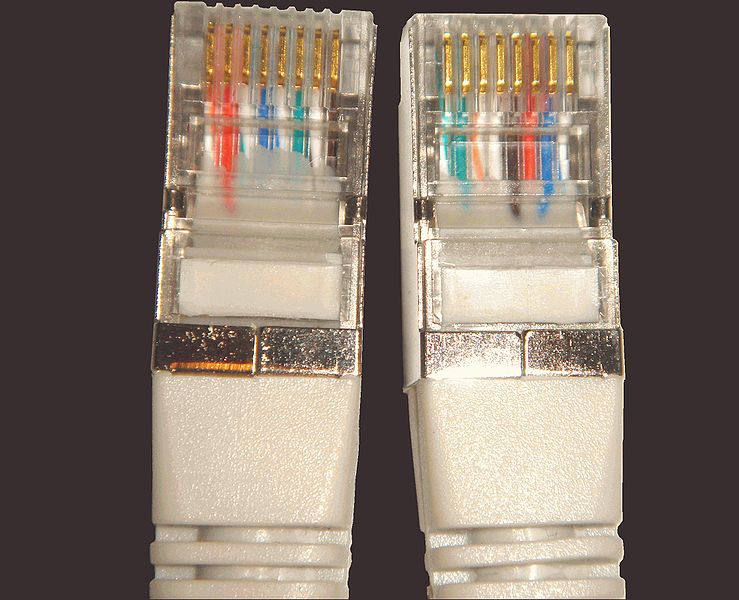
There are two standards for terminating cat5, cat5e and cat6 cables: 568A and 568B. GTRI uses the 568B standard. Wikipedia has a good wiring diagram that depicts the pin outs and colors used in both standards. The applicable portions are reproduced from Wikipedia below.
|
|
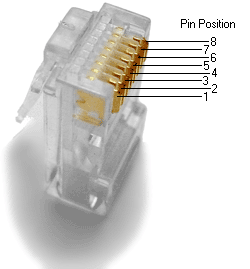


Some notes for actually assembling the plugs:
- Hold the cable sheath tightly while untwisting the wire pairs. The twists are essential to a low-noise connection and therefore we want to untwist as little as possible.
- Push the wires firmly into the plug while squeezing the crimpers.
- Ensure that the plastic cable sheathing is trapped under the wedge in the plug when squeezing the crimpers.
- Use a cable tester on every cable to ensure that the cable is properly made.
- Label both ends of any cable that is installed in a server room with the source and destination. For example,
Switch5 Port 14 <-> Gripper Eth2.
| Cut to Length vs. Standard Length When possible, all cables should be cut to length. Cut cables to be installed in racks to length. This will make the racks neater, conserve cable, and improve airflow within the rack. But if the switch is at the top of the rack, as is most common, extra length cable can be neatly kept contained in the cable wiring harness. This allows for repositioning of cables during maintenance. A standard cable length of 7' (seven feet) is able to join any system in a rack to a switch at the top and have a bit of extra slack to the stored in the harness. |
| High Performance Clusters Cables in High Performance Clusters (HPC) should be all cut to the exact same length for those that join compute nodes to their interconnect switch. The length should be the shortest length possible for the longest required path and then all others should be identical. This prevents a short path node from "always winning" in network congestion issues. |
- Show your cable to your supervisor to determine if it is of acceptable quality.
- This video demonstrates how to make cat5 cables and keystone jacks.
| Video Warning: Use the 568B standard The video begins with the 568A standard. Ensure that your cable looks like the 568B standard that begins at 2 minutes and 52 seconds into the video. |
| Video Warning: Crossover Cables The video erroneously suggests that a crossover cable can be constructed by wiring a cable with the 568A standard on one end and the 568B standard on the other end. This is NOT correct. However, this should not be an issue as modern gigabit switches and network interface cards auto sense if they need to transmit or receive on a crossover cable. The wiring diagram for a gigabit crossover cable is included for completeness |
|
|
|

LIN:Top of section
LIN:Top of page
Exercises
| Make a labeled cable Make a fully tested and correctly labeled straight-through cat5e cable for use in gbit networking. Ask a supervisor for how long the cable should be and what the end connections will be so you can make a correct label. |